Hands down, the bathroom gets our vote for the smallest space with the biggest impact. It also presents one of the trickiest design and remodel challenges: bathroom flooring.
What exactly is so difficult about selecting and installing the right bathroom flooring for your project? To understand the potential issues—read: unforeseen costs and delays—we need to talk about the anatomy of the floor. Think of it like the human body.
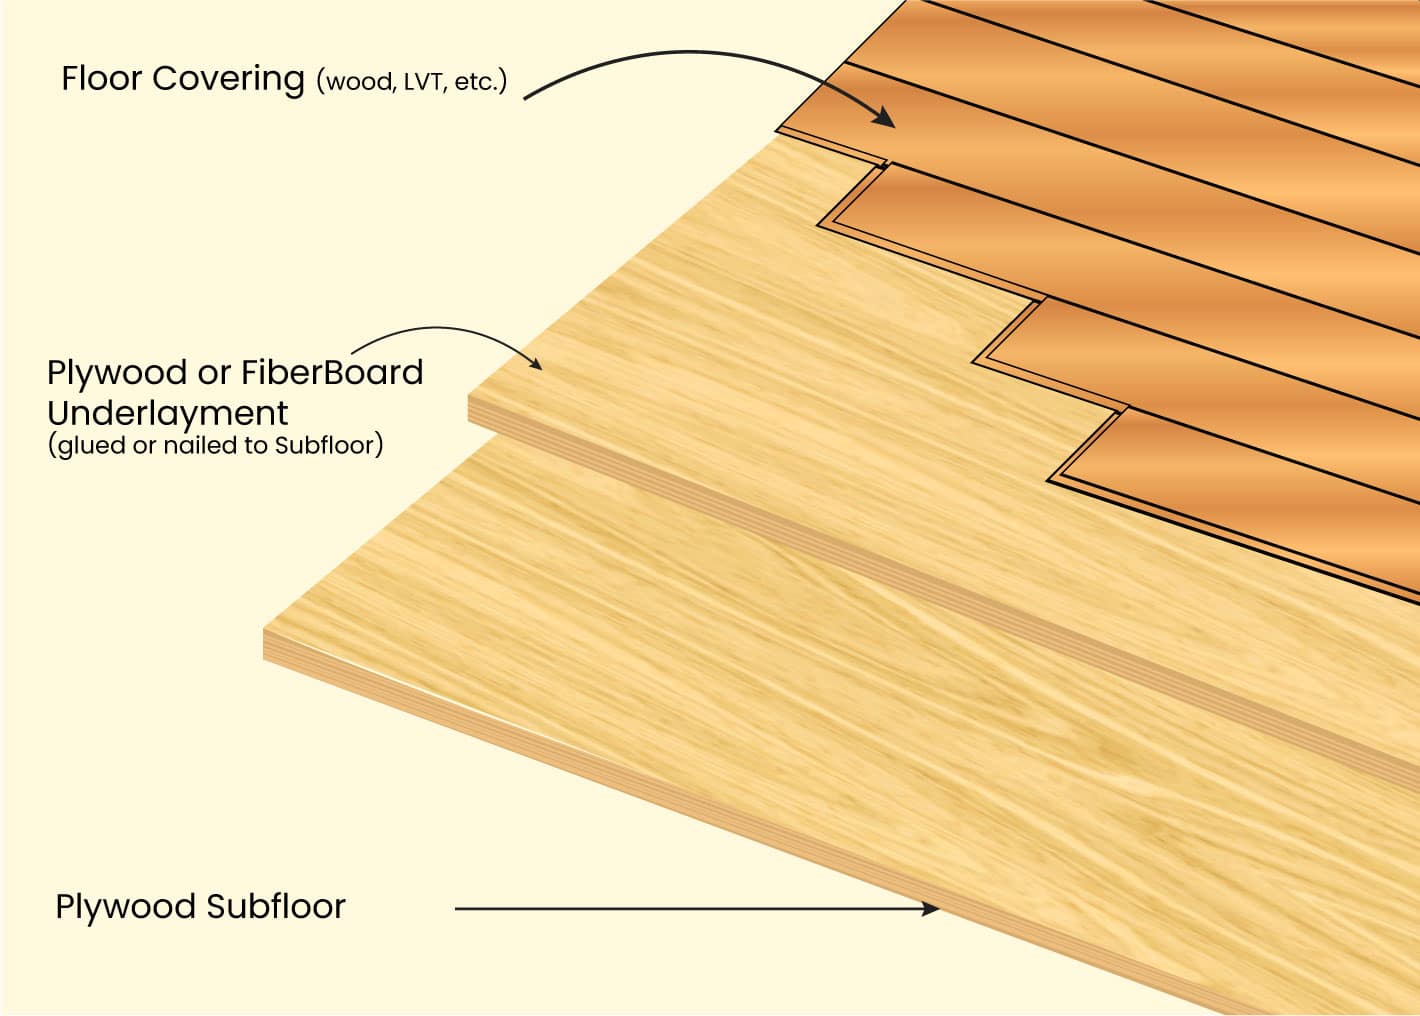
The Anatomy of the Floor
- Floor Covering: This is the surface or skin level. You might choose carpet, hardwood planks, natural stone tiles, or resilient materials like vinyl or cork.
- Underlayment: Like subcutaneous fat, this layer cushions and insulates the structure. It also provides sound damping and—critical for bathrooms—a moisture barrier. Not all floor coverings require an underlayment, but we usually install a ¾” plywood or fiber board underlayment, glued or nailed to the subfloor, on which the floor covering is installed.
- Subfloor: Just as muscle adds a strong layer to the body, so the subfloor provides a level and supportive surface on which the underlayment and floor covering rest.
- Joists or Concrete Slab: Think of joists as the bones that distribute the weight of the entire structure. Instead of a timber-joisted floor, some buildings feature a concrete slab. Each type carries its own special considerations that you cannot afford to ignore. For example, we recommend treating porous materials like concrete with a moisture barrier.
How to Avoid Costly Mistakes
- Do not forget to inspect the subfloor for structural damage.
As previously mentioned, the subfloor is that nice, flat, middle layer of your floor. Frequently made of plywood, it is susceptible to water damage and dry rot, a fungus that feeds on wood. Don’t fall victim to undetected structural damage. Pay special attention to the area around the toilet. Make any necessary repairs to ensure you have a clean, dry, and level subfloor prior to installing the next layer.
- Don’t settle for any materials that are not water resistant.
We cannot overemphasize this point. Moisture is Enemy Number One. Your materials simply must be capable of withstanding the ambient humidity, leaks, and spills that go with the territory. This excludes carpet installations. We also tend to steer clients away from wood and laminate flooring in favor of water-resistant, easy-to-clean floor coverings like tile, vinyl, or WPC (Wood Plastic Composite) or SPC (Stone Plastic Composite) flooring.
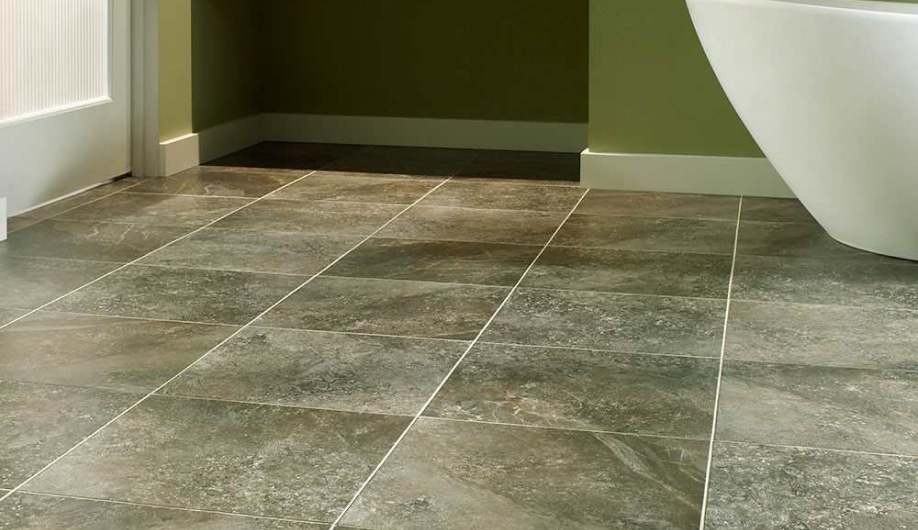
Adura Luxury Vinyl Tile – Athena by Mannington Residential
- Take care not to neglect the seams.
Got your waterproof materials? Great. Now be sure to apply silicone caulking to all seams and edges for a watertight seal.
- Don’t apply the same preparations to all floor coverings.
Thick materials like tile can be installed directly on top of concrete, but you may need underlayment for thinner, resilient-style materials like luxury vinyl. We are big fans of luxury vinyl bathroom floors because they can mimic the beauties of natural wood or stone while delivering a durable product that adds a touch of warmth and cushioning. When installing luxury vinyl, you should be aware that the planks connect like puzzle pieces and, instead of being glued to the subfloor, float above it, requiring room to expand along the walls.
- Never install more than two layers of vinyl.
We get it. It’s tempting to slap down a new layer of vinyl without ripping up the old. And this may surprise you, but so long as you ensure that no moisture has gotten trapped between the layers, it’s actually okay to build on one layer of vinyl. Just remember that if you install more than 2 layers of vinyl, you will void your warranty.
- Refrain from ordering materials online, sight unseen.
Floor coverings—the part that meets the eye—are understandably the aspect on which most homeowners and DIYers fixate. We know you get your inspiration online (we do, too!). But be sure to ask a trusted contractor for samples you can see, touch, and smell, or visit a showroom in person to avoid surprises.
- Don’t forget to protect the tub prior to installing flooring.
The tub, often placed near the toilet, experiences its share of wear and tear. Depending on the material of your tub, there are many options for protecting the finish from scratches. Have an extra tin of car wax? A thin coat, followed by a buff, works wonders on an acrylic tub.
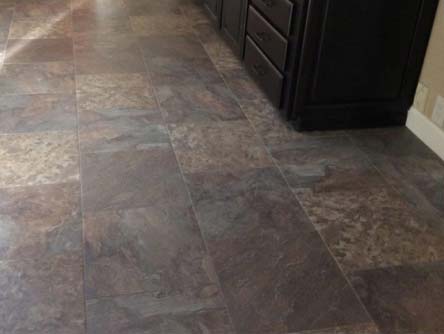
Armstrong Flooring’s Luxury Vinyl Tile Installed by Slaughterbeck Floors
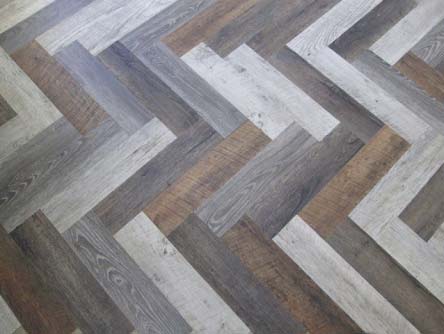
Slaughterbeck Floors Showroom – Luxury Vinyl Planks in Herringbone Pattern
What you don’t know about bathroom flooring can really trip you up. (Sorry.) We find the best results occur when a contractor takes a holistic approach and owns the entire project from sourcing to installation. Done right, a new bathroom floor can dramatically enhance the form and function of your personal retreat.
When you’re ready to boost your home value with a new bathroom floor, give us a call or stop by our showroom in Campbell. The Slaughterbeck Floors team brings 40+ years of experience—more than any other flooring contractor in the Bay Area—plus a speciality in custom design.